the morning I stumbled...

onto the greatest things on the internet!

No, I didn't fall. Although I can be quite a clutz sometimes, today was not one of those days.

The past couple of days have been quite stressful for me, school is biting me in the ass and other issues just seem to be bubbling over my cauldron of life lately. So I decided to be lazy today and just relax, which resulted in me trotting on over to stumbleupon and clicking the stumble button for about an hour straight. Then after finding about 100 things to laugh over, I felt better. Now I want to share those laughs with you. :)

Take a break and enjoy a good laugh.

Exhibit A: Indeed, Michigan just finished building their Great Wall of Michigan.

Exhibit B: When someone is lecturing you.


Exhibit C:


Exhibit D: Viewer discretion is advised.


Exhibit E: A little less inappropriate than exhibit D. 


Exhibit F: Because you need to watch this video at least once in your life. 


<3
--------------------------------------------------

Ending soon! 

I throw my teddy in the air sometimes....

sayin' ayyyyyoooo, have a nice liiiiiiiife yooooo!

I wasn't very creative with that line, but let's ignore that.

This weekend was 1. amazing and great and wonderful and lovely and any other good word you can come up with and 2. too short. I went to visit that lovely man of mine this weekend and we celebrated our Valentines together. That Chris knows me too well, he got me a picture frame, eos lip balms, and pretty much was just the best gift giving boyfriend all weekend long.

He treated me to a hockey game Saturday night that we didn't actually end up even paying for. Thank you random girls for those tickets. This game was also the annual Teddy Bear Toss where you bring in teddy bears and when the team scores their first goal you throw your teddy onto the rink. They collect all the teddies and distribute them out to the children's hospitals. We went to the same game last year but had no idea about the teddies, however we came armed this year.

here's the rink from last year's toss


We also went to go see Warm Bodies, which turned out to be a really good movies about zombie love. For the rest of the weekend we gorged ourselves in cake (recipe coming soon) and did some shopping where I bought a pound of roasted nuts all because some guy at the hockey game had them and then I craved them. 

Eating those nuts now. Nuts so good. 

My Valentine's Day weekend turned out great and I hope you all had a great weekend with your loved ones too! Have a great day guys!

------------------------------------------------------


<3 

Recipe // Cheesy Rigatoni Bake

Almost every weekend I go to visit Chris I bring along one or two new recipes that I really want to try. Chris becomes my guinea pig and I get to finally use those hundreds of recipes I've pinned. We're all happy. This weekend was no different. While at work one very slow night, I grabbed the new Taste of Home magazine and began to flip through it. I usually always stop on the pasta recipes and write them down because they just look so darn good.

I found this Rigatoni Bake recipe and really wanted to try it. Simple and quick, always my cup of tea. However, it did look a little flavorless to me while reading so I knew I wanted to add some more things to it. My new favorite thing for cooking are those pre-made season packets they sell in the baking aisle, they're like awesomeness in a tiny little packet. They add so much flavor and have a choice for almost anything you're making. Try them, now. 

And so, I made the pasta dish and it turned out amazing. So good and let me tell you, you will never eat more cheese in a pasta dish then with this one. It is a must try if you're as big as a nut about pasta as I am. With the extra seasonings and chicken, it is a mouthful of goodness. Check it out my amigos!

x
Ingredients needed:
1 box of rigatoni pasta
2 Tbl butter
1/2 tsp salt
2 cups milk
1/4 cup water
1/4 cup flour
4 eggs, beaten
2 cans tomato sauce
2 cups shredded mozzarella cheese
1/4 grated Pamesan cheese
2 large chicken breasts, shredded
1 chicken and pasta seasoning packet (or use seperate seasonings)

1. Cook pasta. Then in a saucepan, melt butter. Add salt, milk, and water and stir. Gradually stir in the flour until smooth. Bring to a boil and cook for 2 minutes or until sauce has become thick.
TIP: the original recipe says to add the flour in with the butter, before the milk and water. I found this to be a complete clumpy mess and redid it adding the flour last. Works a lot better!

2. In another pan, cook chicken until done and shred into stripes. Pour the 2 cans tomato sauce over the chicken and stir in the seasoning packet.

3. Drain pasta and pour into a 9x13 baking dish. Pour the beaten eggs over the pasta and give it a good stir. Next, pour the tomato and chicken sauce over the pasta, followed by the milk sauce. Cover the dish in cheese.

4. Bake at 375 for 30-35 minutes.

<3

Happy Valentine's Day!!


It's finally here!! Happy Valentine's Day you lovely creatures you! I still have to wait a day to see my valentine, but I hope all of you are spending time with someone you love <3

So whether you're doing the dirty or going out for a nice classy dinner, or even both, you do your thing. 

And with those words of wisdom, I'll leave you with a little kitty love. 


look, even they love eachother! 
---------------------------------------------------------

Enter my Valentine's Day giveaway
before you leave!! 
(because I love you guys)

<3

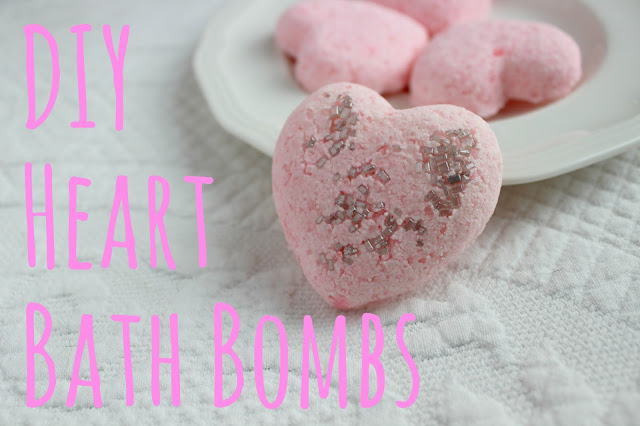
DIY // Valentine's Day Bath Fizzies


Remember seeing those heart shaped bath bombs in the giveaway yesterday? Well if not, 1. you should go enter and 2. keep reading because I'm going to show you how to make those cute little fizzies of love. I've been slowly accumulating everything for this project and got so excited when my last piece (the citric acid) was dropped off in the mail. 

I read so many different tutorials for bath bombs because I didn't want to screw it up. I was very happy at when I finished and I didn't fail. These bath bombs smelt so good and I can't wait to use a couple in a bath! 

Also, I apologize if you're getting sick of that lace bed sheet background. That room has the best light and I don't have a lot of options. I'm working on my creative photography skills. :) 

Alright, to the DIY!  


Supplies Needed:
-Epsom Salt
-Corn starch
-Baking Soda
-Citric Acid (bought mine from here you can buy all different sizes)
-Essential oil ( I used Sweet Pea )
-Plastic Heart Mold

Not pictured:
-Type of oil ( I used Moroccan Argan Oil, olive oil will work too )
-Water
-Food Coloring


1. Mix dry ingredients in a bowl and whisk together until blended. Mix together wet ingredients in a jar until blended.

2. Pour the wet ingredients into the dry ingredients slowly while whisking together. Stir together for several minutes. Some people put the wet ingredients into a spray bottle to be extra careful, but I simply just poured it in from the bowl.

3. When the mixture begins to clump into your hands without completely falling apart, it's done.

4. Begin filling your molds. Do it little by little and pack down as much as possible. They will hold together better this way. I used a spoon, your fingers will work too. Pop the molds out onto a baking sheet lined with a soft towel and waking paper. Let the fizzies dry for about a day or 2, flip them after the first day. 

5. Either wrap them up for gifts or throw them straight into your tub for a spa day of your own.


<3 

Giveaway // Happy Valentine's Day

Well hello there everyone! So I've been having so much fun making cute DIY's for you this past week and I don't think I've ever been so excited for Valentine's Day. I get to see that handsome man of mine in less then 3 days and I simply can't wait any longer. Damn school and work... I made him open one of his gifts last night that I had sent straight to his house, because I'm very impatient when it comes to giving gifts to people. 

I love giving gifts. And like the very impatient person that I am, today I have a Valentine's Day giveaway for you all!! I don't care that I'm 3 days early, like I said, I like giving gifts. I love you guys and I wanted to express my undying love for you through gifts! 

So we all know, we don't care about what I say, so let's just hop into what you're getting. 

YOUR PRIZES!! 


WAM BAM THANK YOU MAM

The giveaway will end Feb 25th at midnight.
Happy V-day everyone! 

a Rafflecopter giveaway

DIY // Wildfox Inspired Glitter Heart Bag


So I know many of you probably stalk Taylor Swift and her amazing sense of fashion and you have probably seen her wearing this Wildfox jumper multiple times. Well I love it, but I'm not about to spend $108 on a darn sweater. Soooooooooooooo instead I decided to get my fix in another way! Make a bag! 

I picked up this canvas tote from Hobby Lobby a while ago and initially I was going to do something else with it, but I liked this idea better. And how cute is it? And it only cost me $5. That's $103 cheaper then what T-swizzle spent, if you can't do math. T-swift has been beat. 

This bag isn't a sweater, so technically it's not really the same thing, but let's just go with it. It's an inspired look by the way...  


Supplies Needed:
-Mod Podge
-Red glitter
-small bucket or cup
-Paintbrush
-Red paint
-Heart template
-Canvas Bag (Hobby Lobby $3) 

 
1. Take your heart template and trace the heart on one side of the bag with a pencil. Begin painting in the heart. Treat it like a coloring book, but make sure to paint INSIDE the lines.

2. When paint is dry, mix together mod podge and glitter in a small bucket. It doesn't really matter how much you use of what. I guess use more glitter the first round so you don't need to do 2 coats.

3. Cover the heart with the podge mixture. Again, like a coloring book. Again, in the lines.

4. Let dry for the night and in the morning you will have a beautiful Wildfox inspired heart bag!


Adorbs! Hope you enjoyed!

<3

5 Valentine DIY's I'm Loving

Today I wanted to share with you some of my favorite Valentine's Day DIY's that I've recently come across. I usually spend the majority of my time at work on craftgawker or Pinterest. These sites are pretty much where I get all my DIY inspiration from and craftgawker is like a drug. Once you've gawked once you can't ever stop. 

Check out these fabulous DIY's that I found and hopefully they spark your creative side as well!

1 // 2 // 3 // 4 // 5
I mean how cute are those pillows? And how yummy do those berry ice cubes look? 

<3

Pretty Package Love

Since February is all about lovin and moochin and more lovin I want to share with you guys what I've been loving recently and that's packaging. That doesn't sound as exciting as I thought it would. Anywho, I've been nuts about pinning different ways people package their packages. Some people are creative geniuses when it comes to this stuff.

I can't stop looking at it. Not that I have anything to package at the moment, but who knows, maybe one day I will and my "Wrap That Baby Up" board on Pinterest will actually be useful.

Let's hop into the many gorgeous ways people are wrapping their packages.

Package. Just because it's funny.

x
I want to be a bee keeper someday and sell my honey like this. 
x
Plain awesomeness.
x
Perfect for V-day! 
x
Brilliant!
x
These are my favorite, adorbs!


I hope you guys been liking the DIY's I've bee posting! More to come and they're all Valentine's Day themed! WOOHOO!!

Package.

<3

DIY // Elastic Hair Ties


These hair ties have been all the rage lately and I've been completely obsessed with them. However I didn't want to spend so much in the stores and get so little when I knew how cheap they were to make. I literally spent months trying to look for elastic at craft stores and guess what?! Michael's, JoAnn's, nor Hobby Lobby has elastic trim! Can you believe it! No fricken craft stores where I lived had the one thing I needed. Balls.

But then Pinterest came to the rescue, yet again. I found the perfect online shop, called Sunshine Shoppe that sells a butt load of elastic trim and cute trim and for super cheap!! Jackpot! I bought several yards for around $12. If you need elastic, go there. 

And que the tutorial! 

Supplies Needed:
Elastic 
Scissors 
Lighter or any type of flame
Your hands


1. Cut each tie to about 9.5 inches. I found this worked best most of the elastic. The glitter elastic I cut to 10 inches, because it doesn't stretch as nicely and that length worked great. 

2. Fold the elastic in half

3. Tie a knot and scoot it towards the end until it become tight.

4. Cut off the excess elastic and use a light to quickly melt the edges. It takes about a second so don't let it sit there and burn the whole tie down. This just helps the edges not to fray. 

4. Repeat until you got them all done! 

I made about 40 or so hair ties for $12 which is WAY more then you could ever get buying them in the store. Pretty sure American Eagle sells 3 of them for that price. 

I'm giving some of these away to friends and I let my sister take some of her favorite, because I really don't need 40 hair ties, even though they're so cute. You may also see these in a giveaway coming soon.... but who can say. 


DIY // Valentine's Day Heart Gloves


I've seen a few tutorials for heart gloves where the two gloves make a heart when put together, like this one,  and I think they're so cute. I knew I couldn't pass up the opportunity to put my own little spin on these and of course, I had to show you! It's such a simple DIY and you know, everything DIY I do is so simple and easy! 

Today I'm going to show you how I made my version of these gloves. I made two different types because I couldn't help myself and the gloves were on sale. 

Hope you like <3

Supplies needed:
Gloves 
Felt
String
Needle


1. Gather all your supplies. I got my gloves from target, they were on sale for $2 (can't beat that) and they were the touch screen compatible ones (even better!!).

2. Take a piece of felt and fold it in half. Use a sharp scissors to cut out 2 big hearts and 2 little hearts. I just free handed this step, but if you would like to use a stencil Google images is the perfect place to go!

3. Begin to sew your hearts onto the palm of the glove in spots that you would like them to be. Be careful not to sew all the way through the glove or you won't be able to put your hand through. Trust me, I did this countless of times while sewing the hearts on.

4. Put on and look fabulous!

For the white gloves, do the same exact steps but with one big heart on each palm.


Hope you all enjoyed today's tutorial! Come back for more Valentine DIY's this week and a giveaway next week!

<3 
© hello, it's kelly
Design:Maira Gall.